Settings page
The settings page is visible only to users with the Organization manager or Organization Owner role and can be accessed
by clicking the Settings menu item in the sidebar.
All users
The All users tab provides a list of users in the organization and allows to configure or remove existing users.
To add a new user to your organization, send the user an invite. As soon as the user accepts it, the user is added to
the organization.
The currently existing user accounts are listed, displaying their username, e-mail address and assigned projects.
Removing users
To remove a user, click the user's Remove button. After confirming the warning, the user will be removed from the organization.
Assigning/Revoking administrative rights
To assign Administrative rights to a user, choose the appropriate role in the user's row. After confirming the action, the user's role will be updated to the selected value.
At least 1 user with the organization owner role should always remain present, to prevent lock-out. This is enforced by the application.
Workspaces

Managing workspaces
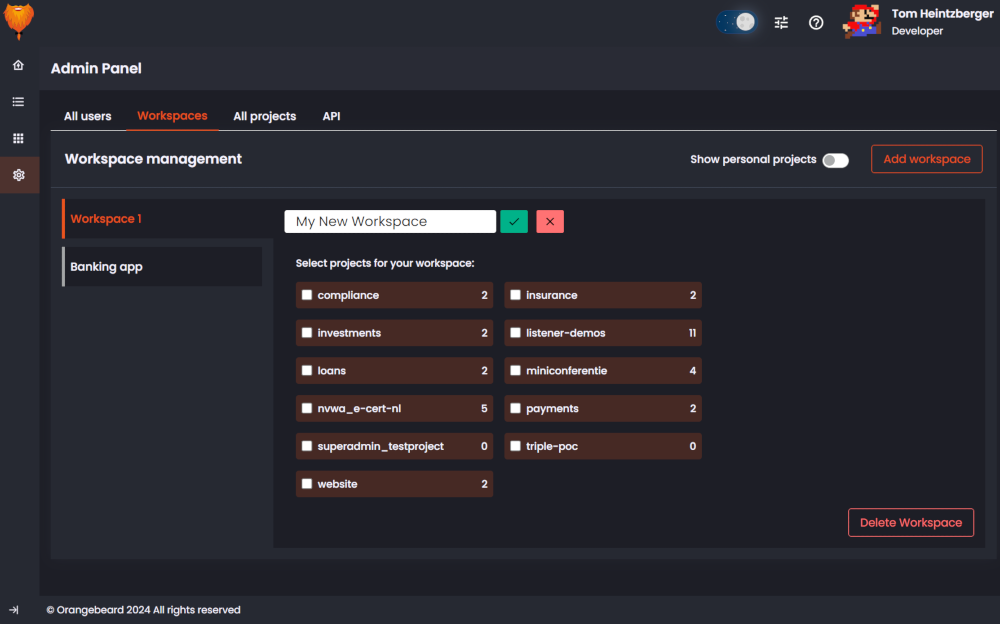
In workspace management, workspaces can be created, updated and deleted. To select the workspace to update or delete, click the workspace in the left column on the page. The workspace details will then be displayed.
Adding a workspace
To add a workspace, click the Add workspace button. A new workspace (Workspace 1) will appear. It can now be
configured like any existing workspace.
Configuring a workspace
The workspace configuration allows for the following parameters to be configured:
- Workspace name: Click the workspace name in the main configuration window to make it editable. Choose a new, unique workspace name and press the checkmark to save the new name
- Workspace projects: Check the boxes for all projects that should be in this workspace. If personal projects need to be
added, these can be made visible with the
Show personal projectstoggle.
A project can be assigned to multiple workspaces!
A note about project visibility: when a user has access to at least one project in a workspace, the workspace overview cards for all projects in that workspace will be displayed on the workspace overview. The user will not be able to view test execution details for the projects the user is not assigned to, nor will the user be able to select those projects from the project selector.
This can be leveraged to create a high-level dashboard for users that do not require full project access.
Deleting a workspace
To delete a workspace, select it in the left column and press the Delete workspace button on the bottom right. After
confirmation, the workspace will be deleted.
When a workspace is deleted, it will no longer be displayed in the project selection drop down. Users will then have to
access the projects through another workspace, or the All projects option in the project selection drop-down.
All projects
The All projects tab displays all configured projects in the application and provides a shortcut to the project's
members project management page.
Adding a project
To add a new project, click the Add project button, provide a project name and press Create.
Projects can be created, but not removed. To render a project invisible to users and disallow collection of results for the project, unassign all members from it.
Managing project members
Using the Edit members button for each project, the user navigates to the project management
page for the selected project.
System Settings
On the system setting tab, system-wide configuration parameters can be adjusted and stored.
- Today Offset: Specify the start time for the today filters. Defaults to midnight 00:00. Choosing another value here will filter from the given time instead of midnight.
- Skip Weekend: if enabled, the today filter will skip weekend days in its cutoff. I.e. when test run nightly, but only on weekdays, the today filters will include friday night's tests on monday.
API
All of our APIs publish their respective Swagger documentation in the API tab in the admin panel for maximum transparency.
Only the listener API can be accessed using the user's listener token. The other APIs
have 2 types of endpoints: /ui/* and /api/*. Only the UI endpoints are accessible to the user, using the user's
KeyCloak login token.
API summaries
- Test Results API
- User API
- Project API
- Listener API
- User Input API
- Auto Test Pilot
- Auto Analyzer
The test results API holds all test output of test runs that have finished.
The user API provides user information and allows user management.
The project API holds project, test set and workspace related information.
The listener API is the main entrypoint for test tools to report their output. See
'Connecting Test Tools' for more information.
The listener api also provides functionality to track In progress test runs.
The user input API processes user input, like descriptions and test analyses.
The Auto test pilot provides functionality to relate test cases to SUT components and to provide an optimized test run advice for test runs announced to the listener api.
The auto analyzer provides functionality to do automated defect analysis, get previously analyzed defects and save defect analyses for future reference.